
 Banko Stoyanov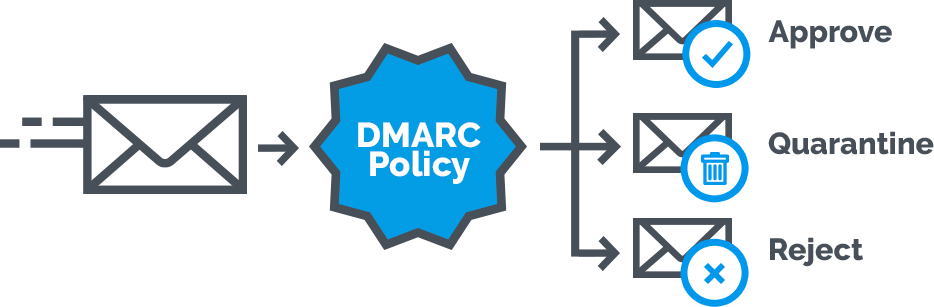
DMARC (Domain-based Message Authentication, Reporting & Conformance) is a powerful email authentication standard that helps protect your domain from spoofing, phishing, and brand abuse. By working with SPF and DKIM, DMARC gives you visibility and control over how your email is being used—and misused—across the Internet.
What Is DMARC and Why Does It Matter?
DMARC is an open standard that connects two existing email authentication technologies—SPF (Sender Policy Framework) and DKIM (DomainKeys Identified Mail)—to the From: address you see in an email.
Why DMARC Helps Your Domain
- It shows which email sources are legitimately sending on your behalf.
- It tells receiving mail systems (like Gmail, Yahoo, or Outlook) how to handle emails that fail authentication.
Without DMARC, attackers can send fake emails that look like they’re from your domain—hurting trust, deliverability, and even leading to fraud.
1. Audit Your Email Infrastructure
Before you start, take stock of all the systems that send email for your domain. This includes:
- Internal servers
- Marketing platforms
- Third-party services (CRM, newsletters, support systems)
Since multiple teams and vendors may send email on your domain’s behalf, gathering this list early makes implementation smoother.
2. Understand DMARC Policy Levels
Your DMARC policy determines how recipient mail servers should treat messages that don’t pass authentication.
dmarcian
Policy options:
- p=none – Monitor only (no emails are blocked yet).
- p=quarantine – Put failing messages in spam/junk.
- p=reject – Block non-authenticated emails entirely.
Most organizations start in monitoring mode (p=none) to gather data and fix issues before moving to stricter enforcement.
3. Publish Your DMARC Record
To start using DMARC, you must create and add a DMARC record to your DNS. This is a special TXT record that tells the world your authentication policy and where to send DMARC reports.
dmarcian
What a DMARC record does:
- Signals your SPF/DKIM policy to receivers.
- Defines your policy (none, quarantine, reject).
- Includes email addresses to collect daily reports.
If you’re unsure how to publish this record, there are online tools that help generate it and DNS provider instructions you can follow.
4. Review and Interpret DMARC Reports
Once your DMARC record is live, mail providers will start sending DMARC reports (usually within 24–48 hours). These reports show:
- Which systems are sending email on your behalf.
- Whether those emails passed SPF and DKIM checks.
- Potential unauthorized or spoofed activity.
These reports are in XML format and can be hard to read without tools. Many email security platforms will process this data into easy-to-understand dashboards.
5. Move Toward Full Enforcement (p=reject)
After reviewing your reports and fixing any alignment problems, you can strengthen your DMARC policy:
- Increase to quarantine to start sending suspicious messages to spam.
- Move to reject once legitimate sources are fully aligned.
Reaching p=reject is the best way to stop spoofed emails from ever being delivered, giving you true control of your domain’s email reputation.
Troubleshooting Tips
- If you’re not seeing DMARC reports:
- Check your DNS propagation.
- Make sure your DMARC record is correctly formatted.
- Confirm your reporting email addresses are correct.
Final Thoughts
Implementing DMARC offers big benefits:
✅ Better email deliverability
✅ Reduced spoofing and phishing attacks
✅ Clear insight into your email ecosystem
Most organizations start in monitor mode and gradually enforce stricter policies as they fix issues and gain confidence.
If you want help implementing DMARC, there are tools and platforms available that can automate setup, process reports, and guide you to stricter enforcement with less manual effort.
 Banko Stoyanov