Home » CMSs » Fixing the ‘503 Error’ in WordPress in a few steps
Fixing the ‘503 Error’ in WordPress in a few steps
Did you ever come across the 503 error on your WordPress site? It’s a pretty common error in WordPress, but fear not! Today, we have a tutorial that will guide you through the steps to fix it.
Don’t worry if the steps seem a bit technical – you don’t need to be an expert to follow along.
In this article, we’ll first discuss what causes the 503 error in WordPress. Then, we’ll provide you with all the potential solutions to resolve it, and even show you how to prevent encountering the 503 error in the future.
So, let’s get started!
What does the 503 error mean? What causes it?
The 503 error happens when your website server is not accessible, meaning the server is currently unavailable. This can occur due to various reasons such as a poorly programmed plugin or theme, a piece of code behaving unexpectedly, a server glitch, a DDoS attack, or issues with your hosting service’s performance.
When it comes to the specific keywords like DDoS attack and 503 error, we need to ensure that the content is friendly and informative. It should not be a literal translation, but rather a coherent and engaging piece of English content.
Let’s take a deeper look at each of the causes of this error.
Really dadly coded themes or plugins
The 503 error is a common issue that can occur when installing or updating a poorly coded plugin or theme in WordPress. When these plugins or themes don’t work properly, it can trigger the 503 error message. We understand how frustrating this can be, but don’t worry, we’re here to help!
Code snippet gone rogue
Customizing a WordPress site is incredibly simple. You have the flexibility to add CSS code wherever needed, upload a PHP script, and make modifications to the site according to your preferences. However, it’s essential to be cautious as a poorly written custom code can lead to various issues. The 503 error you are encountering might be a result of such a faulty code snippet.
Bad configured web hosting setup Shared hosting services are popular due to their affordability, but it’s important to be aware of the potential drawbacks. When your website is hosted alongside other unknown websites on the same server, there is a risk of these websites overusing the server’s resources. This can lead to your website being deprived of its resources and resulting in 503 errors. It’s important to consider these factors, especially if you are using WordPress.
Probably technical server issues
Your server may be experiencing a temporary outage due to ongoing maintenance or scheduled work. Typically, any issues arising from these situations should resolve within a few hours. However, hosting providers often have mirror servers in place to ensure that websites remain accessible and functioning during maintenance periods. This helps prevent any 503 error messages and ensures a seamless user experience.
An unexpected DDoS attack
While it is not a common occurrence, the 503 error could indicate that your website has been targeted by an attack. This type of error, especially, is often associated with DDoS attacks. In these instances, hackers send an excessive amount of traffic to your site in order to overload the server and cause it to crash. You can find more information about DDoS attacks on WordPress sites and ways to minimize the risk here.
Here are the common causes of the 503 error on WordPress websites.
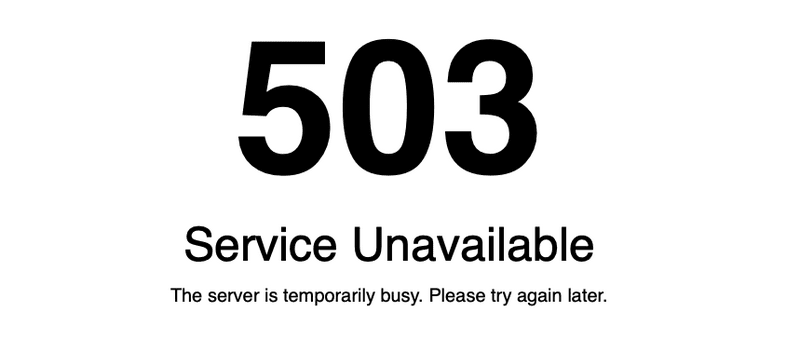
It’s important to note that there are different variations of the error:
– “503 Service Unavailable”
– “503 Service Temporarily Unavailable”
– “HTTP Server Error 503”
– “HTTP Error 503”
– “Error 503 Service Unavailable”
– “The server is temporarily unable to service your request due to maintenance downtime or capacity problems. Please try again later.”
How to Resolve the 503 Error in WordPress
The specific solution that will work for you depends on the underlying cause. The 503 error itself does not provide much information. In this section, we will provide a series of steps to help you identify and resolve the issue.
Before we begin troubleshooting, please make sure to complete the following preliminary steps:
– The 503 error can also occur when updating a plugin or theme on WordPress. Please check your website again to confirm if this was a temporary issue. Remember to clear the cache before checking the site. Please check: How to Make WordPress Updates Safer.
– Additionally, the 503 error may be caused by maintenance work being performed on your web server. You should have received an email notification from your hosting provider regarding this maintenance. In a typical email notification, you will be informed of the expected duration of the server downtime. Please check your email for further information.
If you encounter a 503 error on your WordPress website immediately after adding a code snippet, it’s likely that the code is responsible for the issue. To rectify this, simply remove the code and your website should return to its normal state. However, if you are unable to access your website’s dashboard, we recommend restoring a backup of your website. Your hosting provider should be able to assist you with this.
If none of the above solutions work, let’s proceed with the following steps.
1. Deactivating plugins temporarily
503 errors often occur due to the plugins that are installed on your WordPress website. In order to determine if a plugin is causing the error, you will need to temporarily disable all of them.
Since the 503 error restricts access to your website’s dashboard, you will need to use an FTP client like FileZilla.
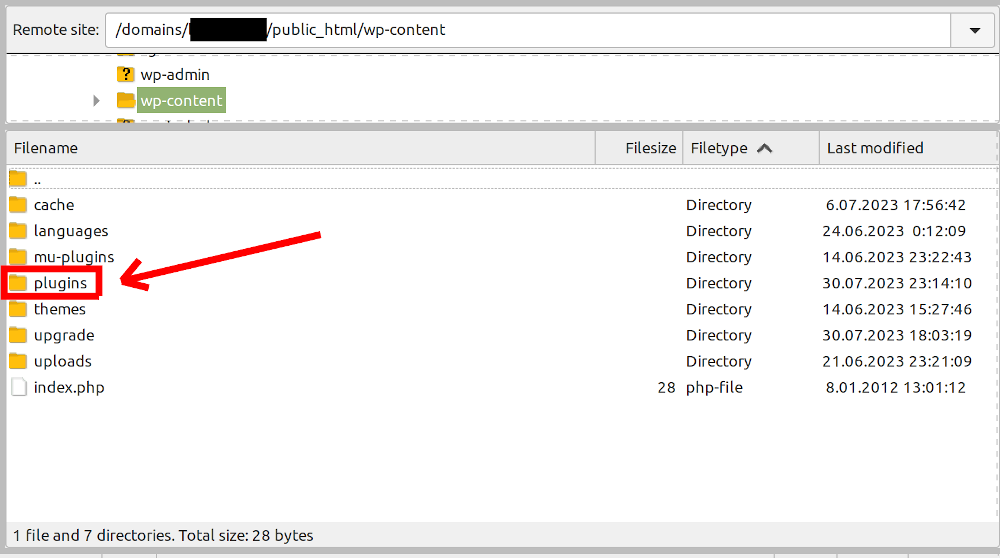
To begin, open FileZilla and connect it to your website. Navigate to the public_html directory and open the corresponding folder. From there, access the wp-content directory. Inside this folder, you will find another one called plugins. This is where all your website’s plugins, active and inactive, are stored. To deactivate them all, simply rename the plugins directory to plugins_ or anything else you prefer.
By following these steps, you can easily address the 503 error and work towards resolving the issue on your WordPress website.
Disabling all plugins by renaming the main plugin directory
Please return to your website once again and check if the 503 error has disappeared. If it has, then it is likely that a plugin was the cause of the error.
Now, it is time to identify the specific plugin that is causing the issues.
Go back to FileZilla and change the name of your plugins directory back to its original name (“plugins”). Enter the directory and systematically work through each of your plugins in the following manner:
Change the name of the first plugin in the directory to something different.
Visit your website to see if the error has disappeared.
If the error is no longer present, then you have found the problematic plugin. If not, change the name of the first plugin back to its original and proceed to test the next one in the same manner.
Continue this process until you locate the plugin that is causing the problems.
Once you have identified the plugin responsible for the error, it is advisable to delete it and search for an alternative. If none of your plugins are causing the 503 error, then please proceed with the next solution.
You can also do that in your control panel by going to File Manager and navigate to your plugis folder, then rename it.
Feel free to reach out if you need further assistance.
2. Deactivating your theme temporarily
Deactivating the theme can be a bit challenging as you cannot just rename the theme folder like you did with the plugins folder. Doing so would result in its own error.
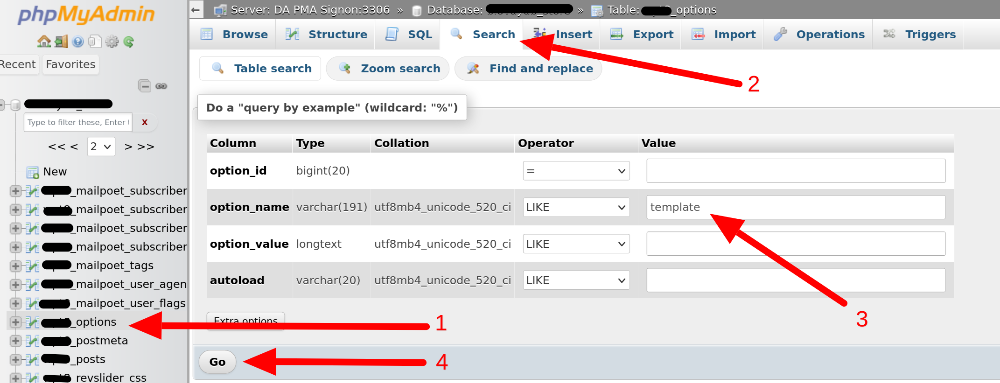
To deactivate the theme, follow these steps: log in to your hosting account, navigate to the cPanel or Directadmin section, and open phpMyAdmin.
Choose wp_options and click on Search. In the option_name field, type “template” and click Go.
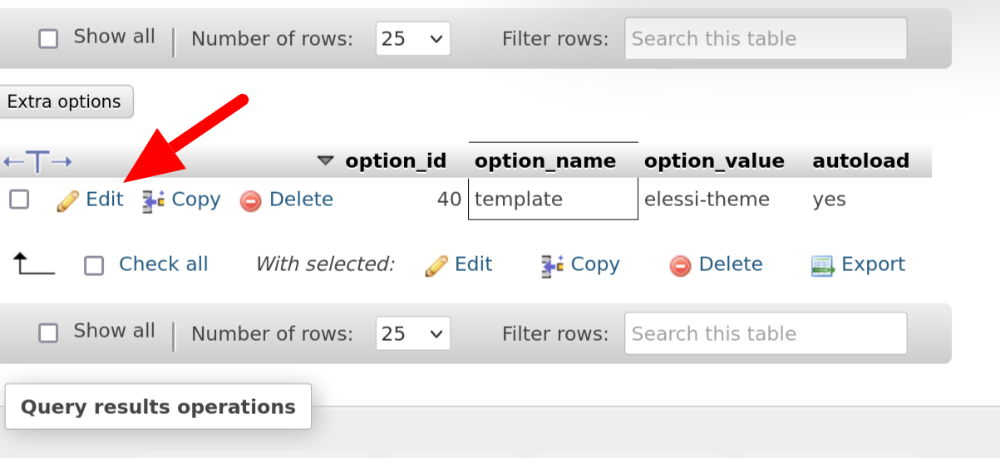
The system will perform a search and display your current theme under the option_value. Click on “Edit” and replace the current theme with “twentytwentyone“.
If this resolves the 503 error, you might consider obtaining a previously functional version of the WordPress theme, installing it, and patiently waiting for the developer to release an update. Alternatively, you have the option of switching to a completely different theme if available.
3. Disabling your CDN temporarily
Sometimes CDNs can cause 503 errors in WordPress websites. If you have a CDN working on your site and experiencing this issue, try disabling it as a quick solution. All CDNs have an option to manually pause them. For example, on Cloudflare, you can log into your account, select your website, and click on the Pause Cloudflare on site option.
Once you have disabled the CDN, check your website. If the 503 error still persists, you can unpause the CDN and move on to the next solution.
4. Limiting your WordPress Heartbeat API
The Heartbeat API is a crucial tool that performs several important tasks in WordPress. It enables features such as automatically saving posts, displaying plugin notifications, and preventing multiple users from editing the same post simultaneously.
While the API is essential, it does require server resources to function properly. If your server is unable to handle the demands of the Heartbeat API, you may encounter a 503 error. To determine whether the API is causing this error, you can temporarily disable it.
To disable the Heartbeat API, follow these steps:
1. Open your FTP client, such as FileZilla.
2. Connect to your website using the FTP client.
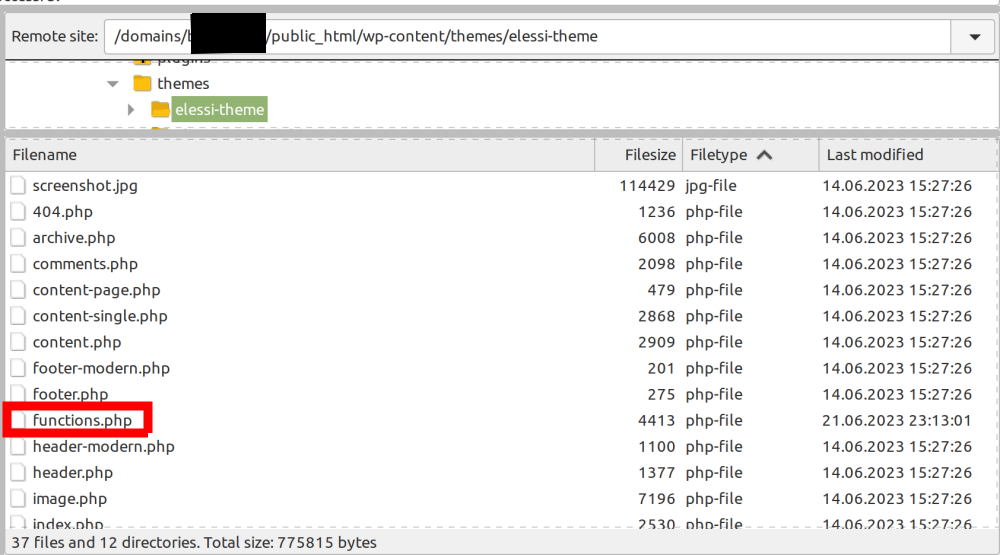
3. Navigate to the directory path: public_html → wp-content → themes.
4. Open the directory of your current theme.
5. Download a copy of the functions.php file.
6. Edit the functions.php file to disable the Heartbeat API.
By following these steps, you can address the issue of the 503 error caused by the Heartbeat API in a friendly and efficient manner.
Please include the code snippet below at the beginning / after < ? php tag:
add_action( 'init', 'stop_heartbeat', 1 );
function stop_heartbeat() {
wp_deregister_script('heartbeat')
}
To resolve a 503 error in WordPress, follow these steps:
1. Save the file, upload it again, and check your website. If the error disappears, then you have identified the culprit causing the issue.
2. However, it’s important to note that the Heartbeat API is essential for your WordPress site’s functionality. Therefore, disabling it permanently is not recommended. If you want to reduce its frequency, you can install the Heartbeat control plugin.
3. Before setting up the Heartbeat control plugin, ensure you delete the code snippet from the functions.php file.
It can be done via your control panel as well.
5. Enabling WP_DEBUG
When all other solutions fail, enabling the debug mode can provide you with answers.
You have two options to enable the debug mode: using a plugin or modifying the wp-config file.
However, if you are experiencing a 503 error that prevents you from accessing the dashboard, installing a plugin is not possible. In this case, you need to manually modify the wp-config file.
To do this, open your FTP client (such as FileZilla) and navigate to public_html → wp-config.php. Download a copy of this file and then proceed to edit it. Or you can do it in your control panel by browsing via File Manager and go to your config file and edit. Insert the following code snippet:
To find the debug.log file, navigate to the wp-content directory. This file contains information about the errors your website has been facing, including the specific lines of code that caused them. Although you won’t see a direct indication of the 503 error, we recommend sharing the log with your hosting provider for assistance.
By now, you should have resolved the 503 WordPress error. To prevent future occurrences, take necessary measures to ensure it doesn’t happen again on your site.
How to Avoid 503 Error in WordPress
To prevent encountering a 503 error in WordPress in the future, it is important to take certain precautions. Make sure to keep following tips in mind:
1. Regularly Update WordPress: Ensure that your WordPress platform is always up to date. Regular updates often include bug fixes and security improvements that can help prevent potential errors, including the 503 error.
2. Optimize Plugins and Themes: Use only necessary plugins and themes on your WordPress site, and make sure they are always updated to their latest versions. Sometimes outdated or incompatible plugins/themes can cause errors, so it’s important to optimize and check for any conflicts.
3. Monitor Your Server Resources: Running too many resource-intensive plugins or themes simultaneously can lead to server overload and result in a 503 error. Keep track of your server resources, and if necessary, upgrade to a higher hosting plan.
4. Use a Caching Plugin: Implementing a caching plugin can significantly improve your site’s performance and reduce the chances of encountering a 503 error. Caching plugins create static versions of your web pages, reducing the load on your server.
5. Regularly Backup Your Website: Perform regular backups of your WordPress website in case any errors occur. If you do encounter a 503 error, having a recent backup will allow you to restore your site to a functioning state.
By following these preventive measures, you can minimize the chances of facing a 503 error in WordPress. Remember to stay updated, optimize your site, monitor server resources, use caching, and always have a backup plan in case any issues arise.
Also:
Make sure to use themes and plugins from the WordPress repository or trustworthy developers, such as Themeisle. You can find more information on how to select a suitable theme and plugin.
If your website requires more resources to function properly, consider upgrading to a better hosting plan.
Employ a firewall as a preventive measure against DDoS attacks.
Before implementing plugins on your live website, it is advisable to install or update them on a staging site first.
That’s all! We have reached the end of this article. Hope you find it informative and interesting. Please, share it if you do.
CooliceHost.com Blog is using cookies. We use cookies to ensure that we give you the best experience on our website. By continuing to use this site, you are agreeing to our use of cookies. AcceptRejectLearn More
Privacy & Cookies Policy
Privacy Overview
This website uses cookies to improve your experience while you navigate through the website. Out of these, the cookies that are categorized as necessary are stored on your browser as they are essential for the working of basic functionalities of the website. We also use third-party cookies that help us analyze and understand how you use this website. These cookies will be stored in your browser only with your consent. You also have the option to opt-out of these cookies. But opting out of some of these cookies may affect your browsing experience.
Necessary cookies are absolutely essential for the website to function properly. This category only includes cookies that ensures basic functionalities and security features of the website. These cookies do not store any personal information.
Any cookies that may not be particularly necessary for the website to function and is used specifically to collect user personal data via analytics, ads, other embedded contents are termed as non-necessary cookies. It is mandatory to procure user consent prior to running these cookies on your website.